How to Create a Directory Listing
Directory Listings are one of the most powerful features of our website and allow businesses, charities, and other organisations to quickly create attractive listings which channel visitors back to their own websites, or to Special Offers, Articles, or Events right here on Witheridge.Online.
You can keep this page open for reference while creating your Directory Listing in a new browser tab. Click the button below then come back to these instructions when you need to:
New Directory ListingAdd Essential Information and Metadata

- After typing the Title of your Company/Charity etc and some basic text describing what you do, you can use any of the built-in WordPress “blocks” to enhance your page further. For more details about inserting WordPress blocks, please see the tutorials for Special Offers and Articles which use the same basic editor.
- In order to add your listing to the interactive Map on Witheridge.Online you’ll need to select “Locate via Latitude and Longitute”.
- The section below gives further instructions for quickly finding your Latitude and Longitude so you can copy it into this box. This will automatically generate an attractive Map with a pin marking your location. If you don’t want to share your exact location, it will still be useful to select the nearest main road or town centre.
- Add your address here.
- Adding a phone number will create a nice clickable link to your Listing.
- Adding an email address will create a nice clickable link to your Listing.
- Adding a website will create a nice clickable link to your Listing.
- Click the settings “cog” icon to display the settings panel if it’s not already visible.
- Click the caret (up/down arrow) if the “Categories” box isn’t already open, and select both a top-level Category (usually “Businesses” or “Community” and a sub-category e.g. “Clubs”. If you don’t see a Category that fits, please contact us using the email icon at the bottom of this page and ask us to add a top-level category or sub-category for your Listing. If you can include the “edit link” (see “You’re Almost Done!” below) in your email that would be super helpful too.
- Click the caret (up/down arrow) if the “Flags” box isn’t already open, and add some relevant search tags either by typing them separated with a comma, or by selecting from the “Most used” suggestions.
Finding Your Longitude and Latitude
Go to Google Maps and zoom in using your mouse scroll wheel (or “pinch and stretch” gesture on a touch-screen). Then right click as accurately as possible on your location. This should bring up the pop-up menu shown below:

- Simply left-click on the numerical value at the top of the list. This is your Longitude and Latitude.
- You should see a confirmation message “Copied to clipboard” appear on screen. Go back to your Listing page and simply paste the value into the Longitute and Latitude box (CTRL-V on Windows PCs).
Adjust Your Social Media Links
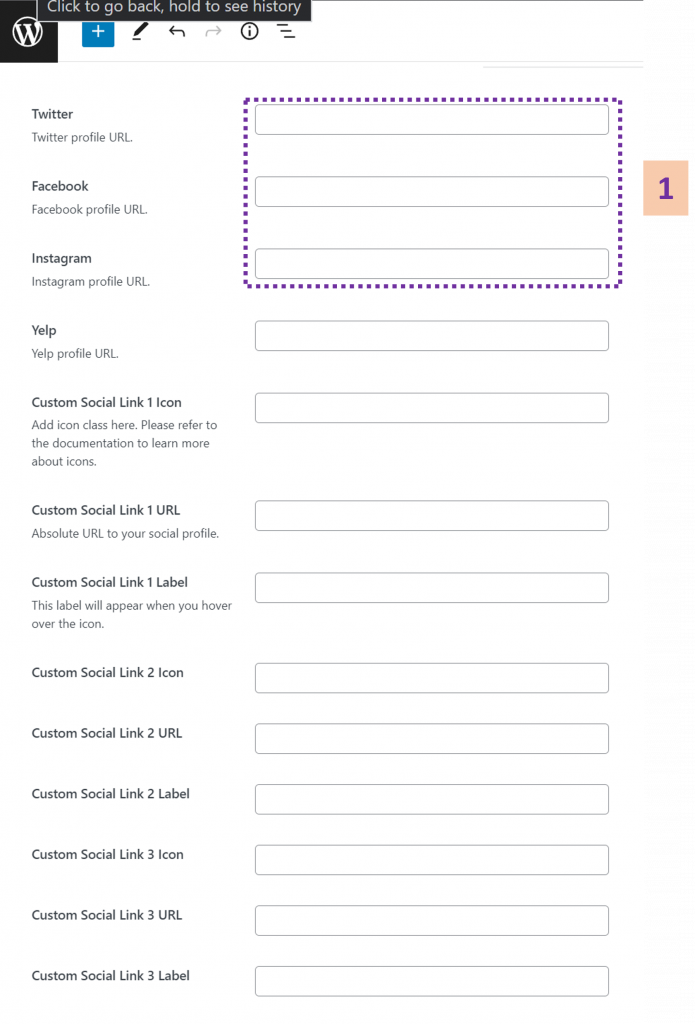
- Scroll down the Listings page until you see boxes for Twitter, Facebook and Instagram. It’s important you add these if possible so they display as nice looking icons in your final Listing.
Add Your Opening Hours
- Your Listing can include an nicely formatted summary of opening times which our visitors tell us is super-useful. Just select the middle option “Select hours” to display the day-by-day settings. If your opening times don’t follow a regular weekly pattern, we suggest you create an image instead, and embed this in the main text description of your listing. Click at the top of the page underneath your title, then click the “+” icon in the top left of the screen.
- Add your opening times and up to two breaks for each day of the week.
Create an Image Carousel

- A really attractive feature of our Directory Listings is the ability to add a ‘carousel’ of images that visitors can browse through, left and right. We recommend adding at least 5 images, and a maximum of 10 images, which you can do by scrolling down to the bottom of the edit page and clicking the “Manage Gallery Images” button. If you have a tonne of images to share, you might also like to create a Gallery – please get in touch by clicking the email icon at the bottom of this page if you’d like to be granted access to more Gallery functions.
Upload or Select Images for the Carousel

- Click on each individual thumbnail to select multiple images for your carousel.
- If you need to upload new images, click on the “Upload files” tab first.
- Once you see tick-marks above all the images you want to use, click the “Select” button in the bottom right of the screen.
Change the Order of Your Carousel Images

- If you want to rearrange the sequence of your images in the carousel, just drag and drop them into place. You can also click on the red “X” icon to remove them.
Almost Done!

- Before clicking finally on the “Submit for Review” button…
- We strongly recommend you copy and save the “edit link” shown in the main browser address bar. You can use this to come back and update (or remove) your Directory Listing whenever you like in future.