How to create a Special Offer
Special Offers are actually created using the same editing screen as regular Articles and are called “posts” in WordPress. The main difference is simply which “Category” checkbox you select before publishing.
You can keep this page open for reference while creating your Special Offer in a new browser tab. Click the button below then come back to these instructions when you need to:
New Special OfferGive Your Post a Title

- Title
- Main text
- Show the “Block Inserter” panel
Add Your Main Image

- Select an Image Block
- Upload a new image (or select “Media Library” to reuse something you uploaded previously).
Adjust Your Main Image

- Drag the blue circle to adjust the size of the image
- Add a caption if required.
- Click the web link icon to make your image clickable.
Add a Web Link to Your Main Image
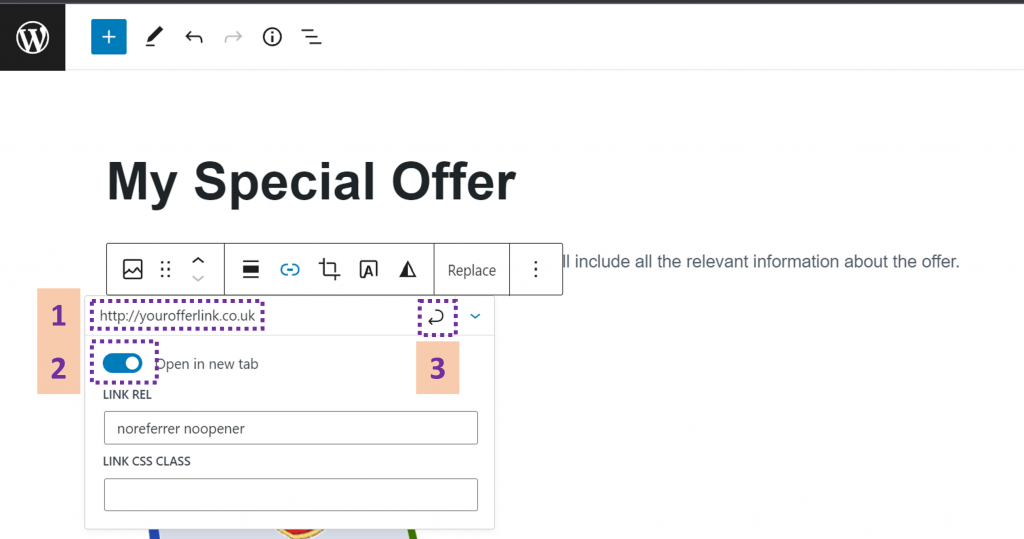
- Type the full URL of your web link. This is where visitors will be taken when they click on your image.
- Select “Open in new tab” (so people can easily come back to your Witheridge.Online page)
- Click the enter/apply icon. Important – if you miss this step you’ll have to do it again!
Add Metadata

- Click the settings “cog” icon in the top right of the screen if the Post settings panel isn’t already visible.
- Click the “Categories” caret (up/down arrow) if the Categories box isn’t already visible.
- Select the “Special Offers” checkbox. Important – if you don’t do this, your post won’t be visible on our Special Offers page.
- Click the “Tags” caret (up/down arrow) if the Tags box isn’t already visible.
- Add search tags that are relevant to your Special Offer, either by typing new ones separated by a comma or by clicking on one of the “Most Used” tags displayed.
- Click the “Featured Image” caret (up/down arrow) if the Featured Image box isn’t already visible.
- Click on the (empty) “Featured Image” box. This will take you to the Media Library where you can upload a new image or select an existing one. The Featured Image is the thumbnail which will be displayed on the main Special Offers page.
- If you want to choose a different image, click the “Replace Image” button.
- Go back up to the top (right) of the page and click the “Publish” button.
Almost Done!

- Before clicking finally on the “Submit for Review” button…
- We strongly recommend you copy and save the “edit link” shown in the main browser address bar. You can use this to come back and update (or remove) your Special Offer whenever you like in future.